Setup
Configure Cloud Account
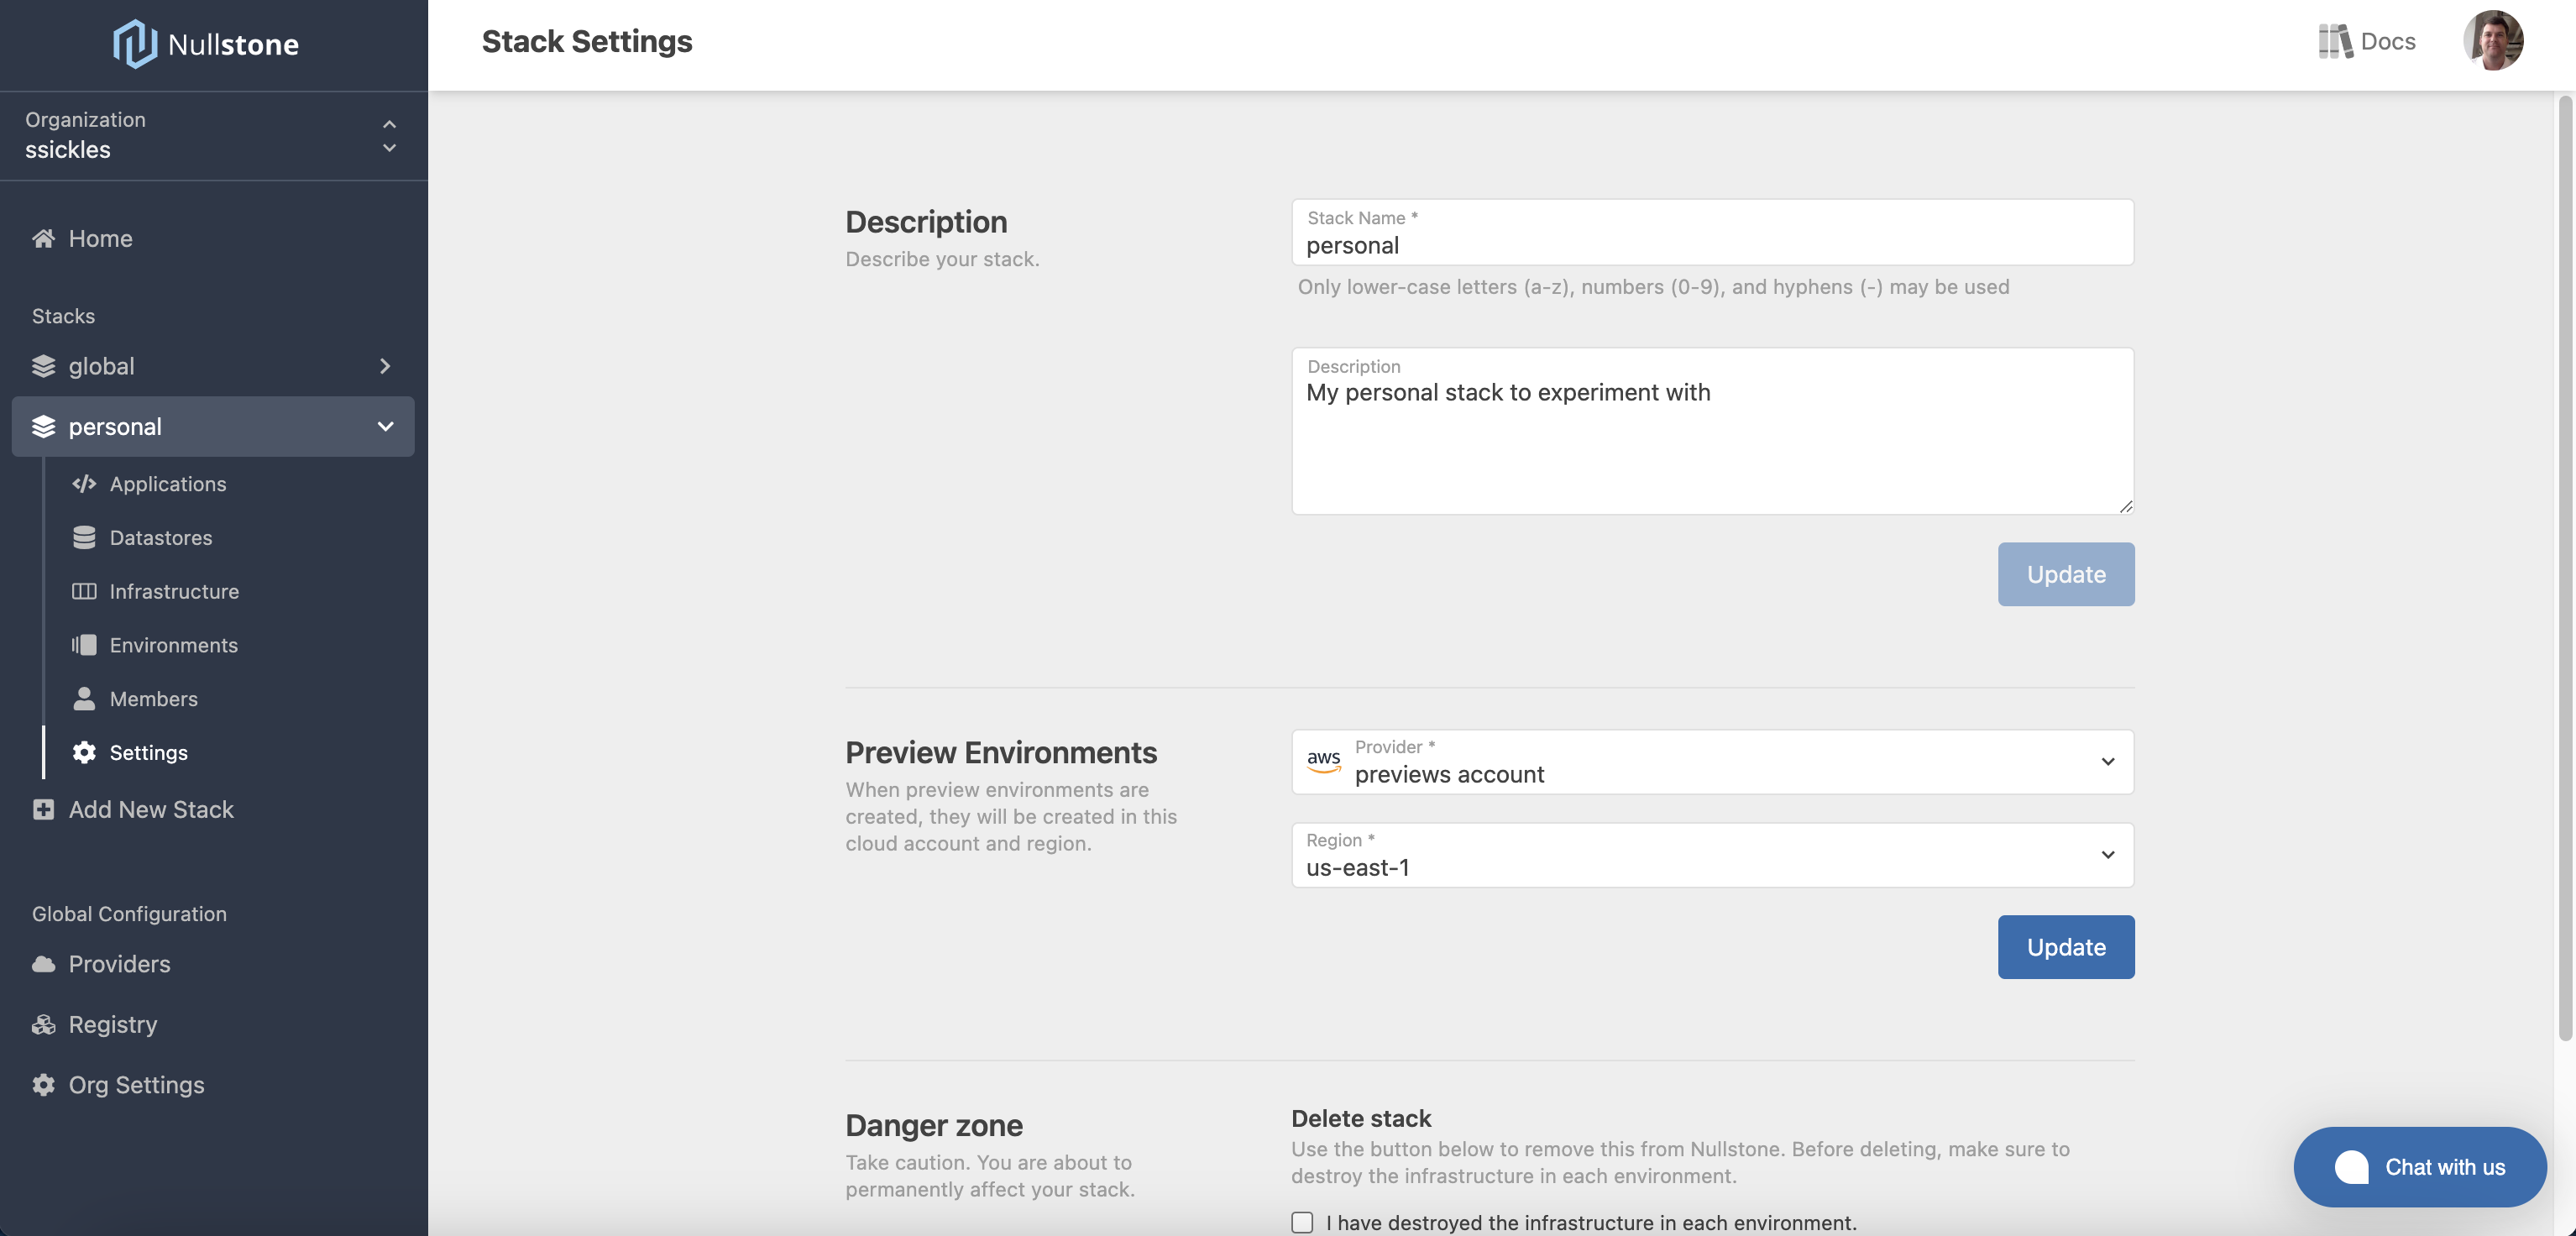
To get started, first configure the cloud account and region that you want your preview environments to be launched in. This setting is located on the settings page for the stack. Any preview environments created for applications in the stack will be launched into this account and region.

Enable Previews for an Application
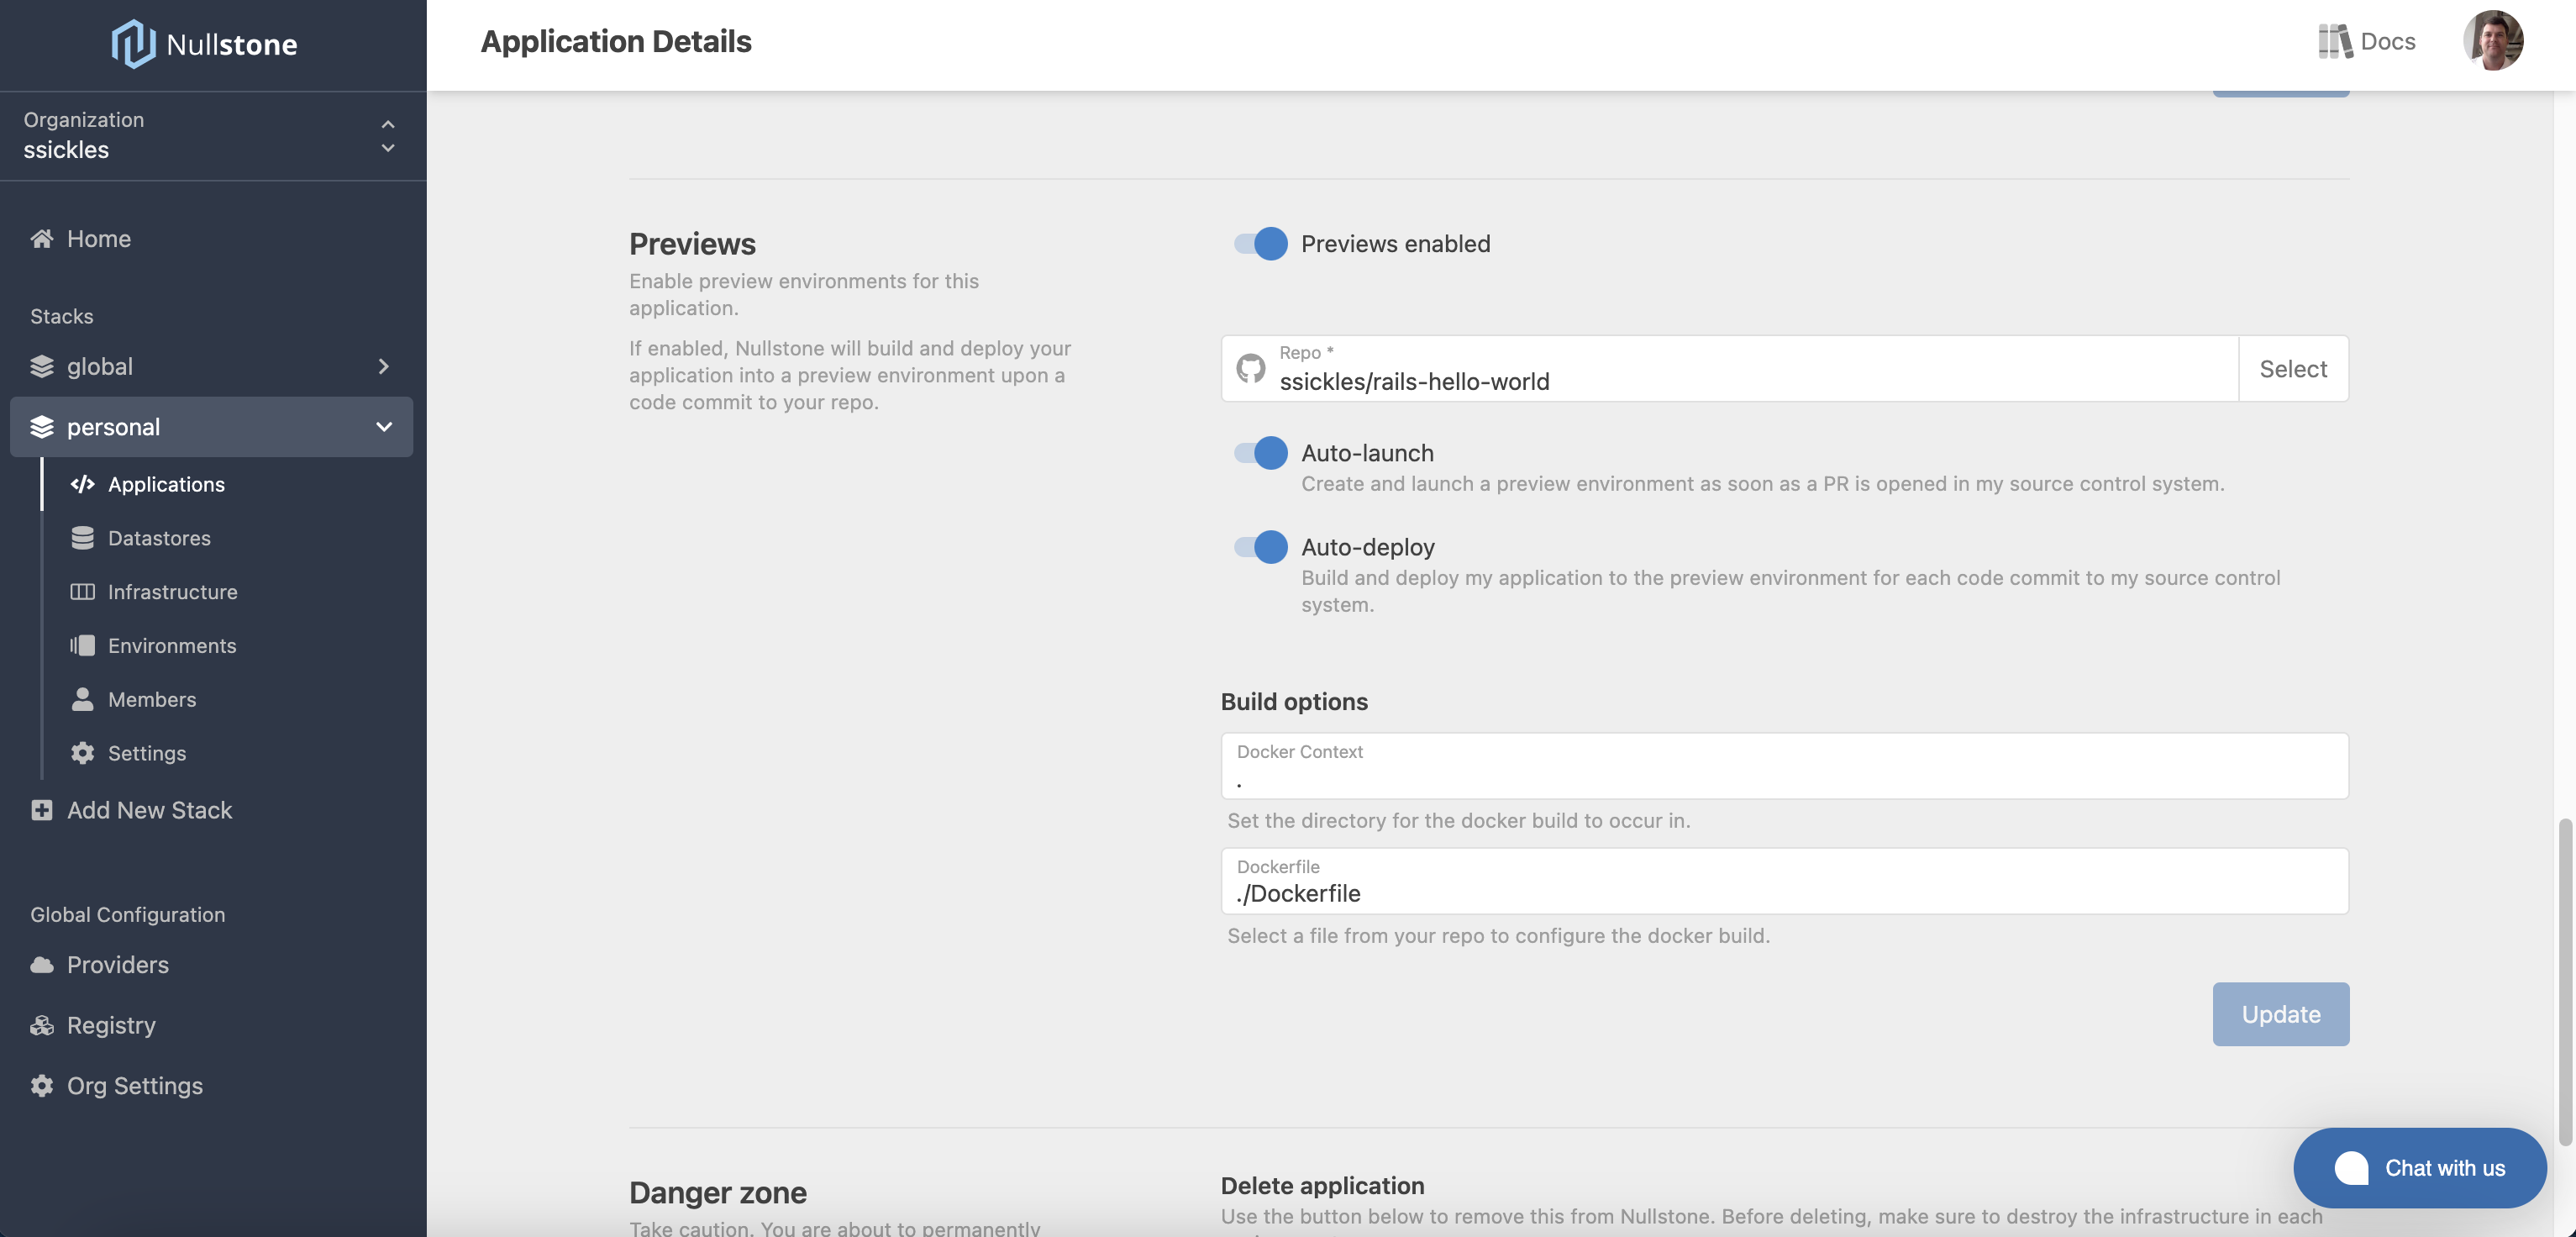
To trigger the preview environment creation process when PRs are opened, you must enable this option per application. Navigate to the homepage for the application and click on the Settings button next to the application name. Scroll down to the Preview Environments section and click to toggle preview environments on.

Configuration Options
Repo
Once previews are enabled, the only required configuration is your GitHub repo. To link this application to your GitHub repo, click the Select button and select the repo from the list.
TIP
If you don't see your repo in the list, make sure you have granted Nullstone access to your GitHub account. Check out the guide to Connect to GitHub.
Auto-Launch
If you want a preview environment to be launched automatically when a PR is opened, turn on the Auto-Launch toggle. This is the recommended setting for most applications. Preview environments use limited resources and are destroyed when the PR is closed.
If this option is toggled off, or you have multiple apps and multiple repos, a message will be posted on your GitHub PR with instructions on how to launch the preview environment.
The Auto-Launch toggle can be found on the Settings page for the application under the Preview Environments section.
Auto-Deploy & Build Configuration
To automatically deploy the code for each code checkin, turn on the Auto-Deploy toggle. This is the recommended setting to make sure you don't forget to update the preview environment as you make changes to your code.
If auto-deploy is enabled, you will be prompted to supply Build Options in order to instruct Nullstone on how to build your application.
- For applications packaged as Docker images, specify the build directory and Dockerfile to use.
- For lambda functions packaged as a zip, specify the path to your files to be zipped and deployed.
- For static sites, specify the path to your static files to be deployed.
If auto-deploy is disabled, you can deploy your application manually using the Nullstone CLI. See the Deployment guide for more information on manual deployment.
IaC Files
To further control the configuration of your preview environment, you can add Infrastructure as Code (IaC) files to your application's repo.
.nullstone/config.yml
To fully control the capabilities, variables, and environment variables of your application, you can provide a .nullstone/config.yaml file. When your application is launched as part of a preview environment, Nullstone will use the configuration in this file to determine the infrastructure. The contents of this file replace the entire configuration. Be sure to include all the configuration you want for your application.
This allows you to make changes to your infrastructure alongside your code changes and merge them together in a single PR. e.g. If you want to add a connection to a Redis cache as part of new feature, add the capability to the .nullstone/config.yaml file. Then, add the code for your new feature and open your PR. The infrastructure and new feature will be launched together.
.nullstone/previews.yaml
An additional file that can be used to configure your preview environments is .nullstone/previews.yaml. This file only allows you to override variables and environment variables for preview environments. In most cases you only need minimal infrastructure resources like CPU or memory for your preview environments. Override the values for these variables in the .nullstone/previews.yaml file to control these settings for your preview environments.
TIP
To learn more about the options and syntax for IaC files, check out the Infrastructure as Code guide.