Configure Root Domain
To add a custom subdomain to an application in Nullstone, you must first configure the root domain. This process involves configuring your domain registrar to point to a DNS zone that is created in your cloud provider.
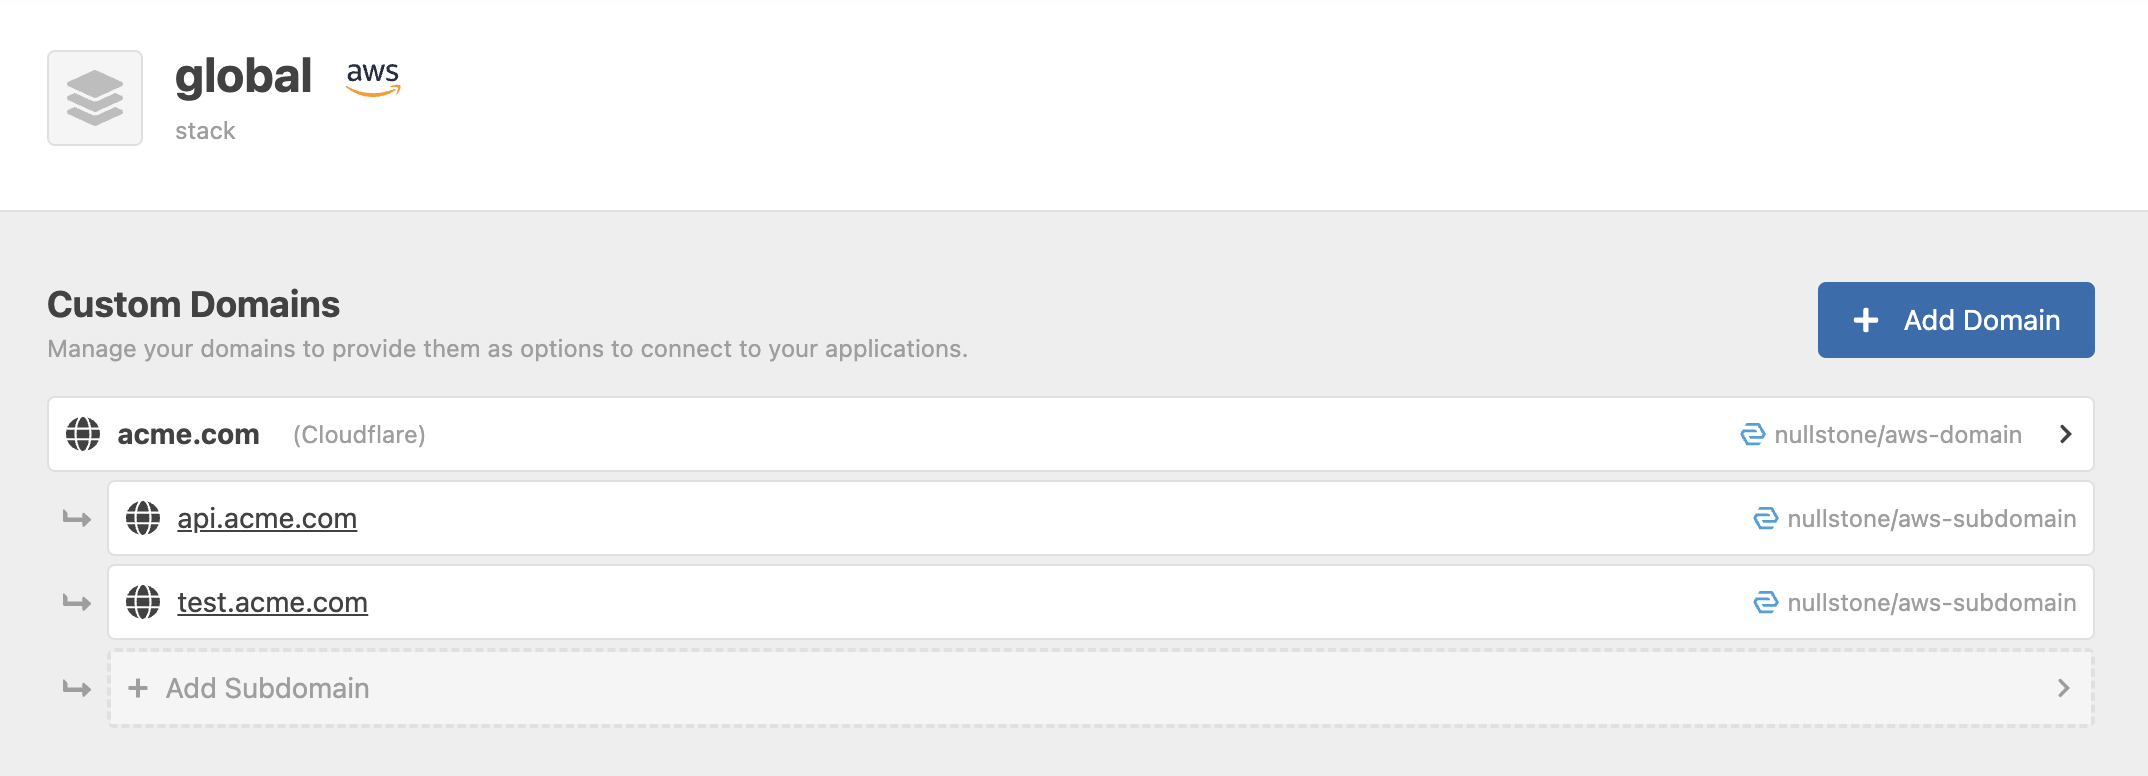
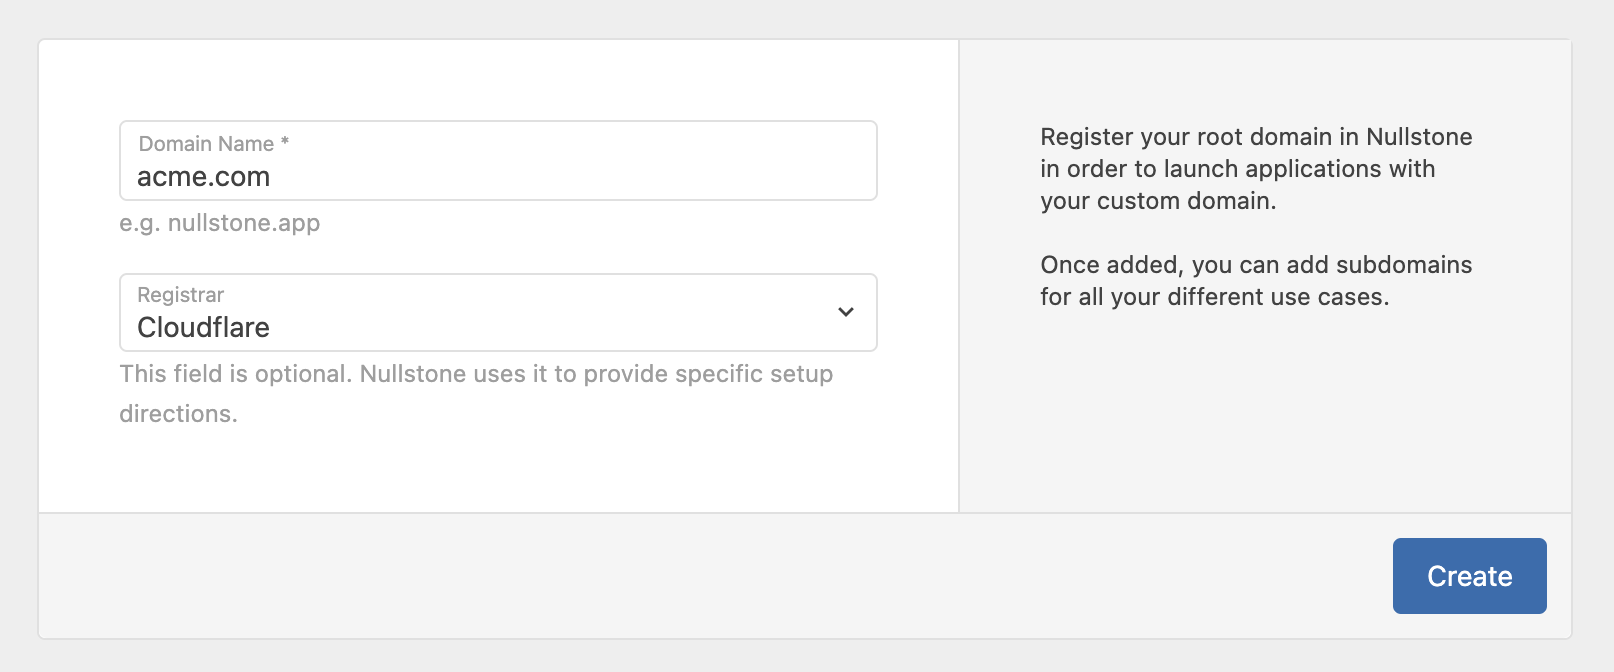
To get started, first navigate to your global stack and click "Add Domain". Enter the domain name and optionally select the registrar you used to purchase the domain.
Launch and Configure
Create DNS Zone
Next, click to launch the domain. This will run the module in your cloud account in order to create a DNS zone. 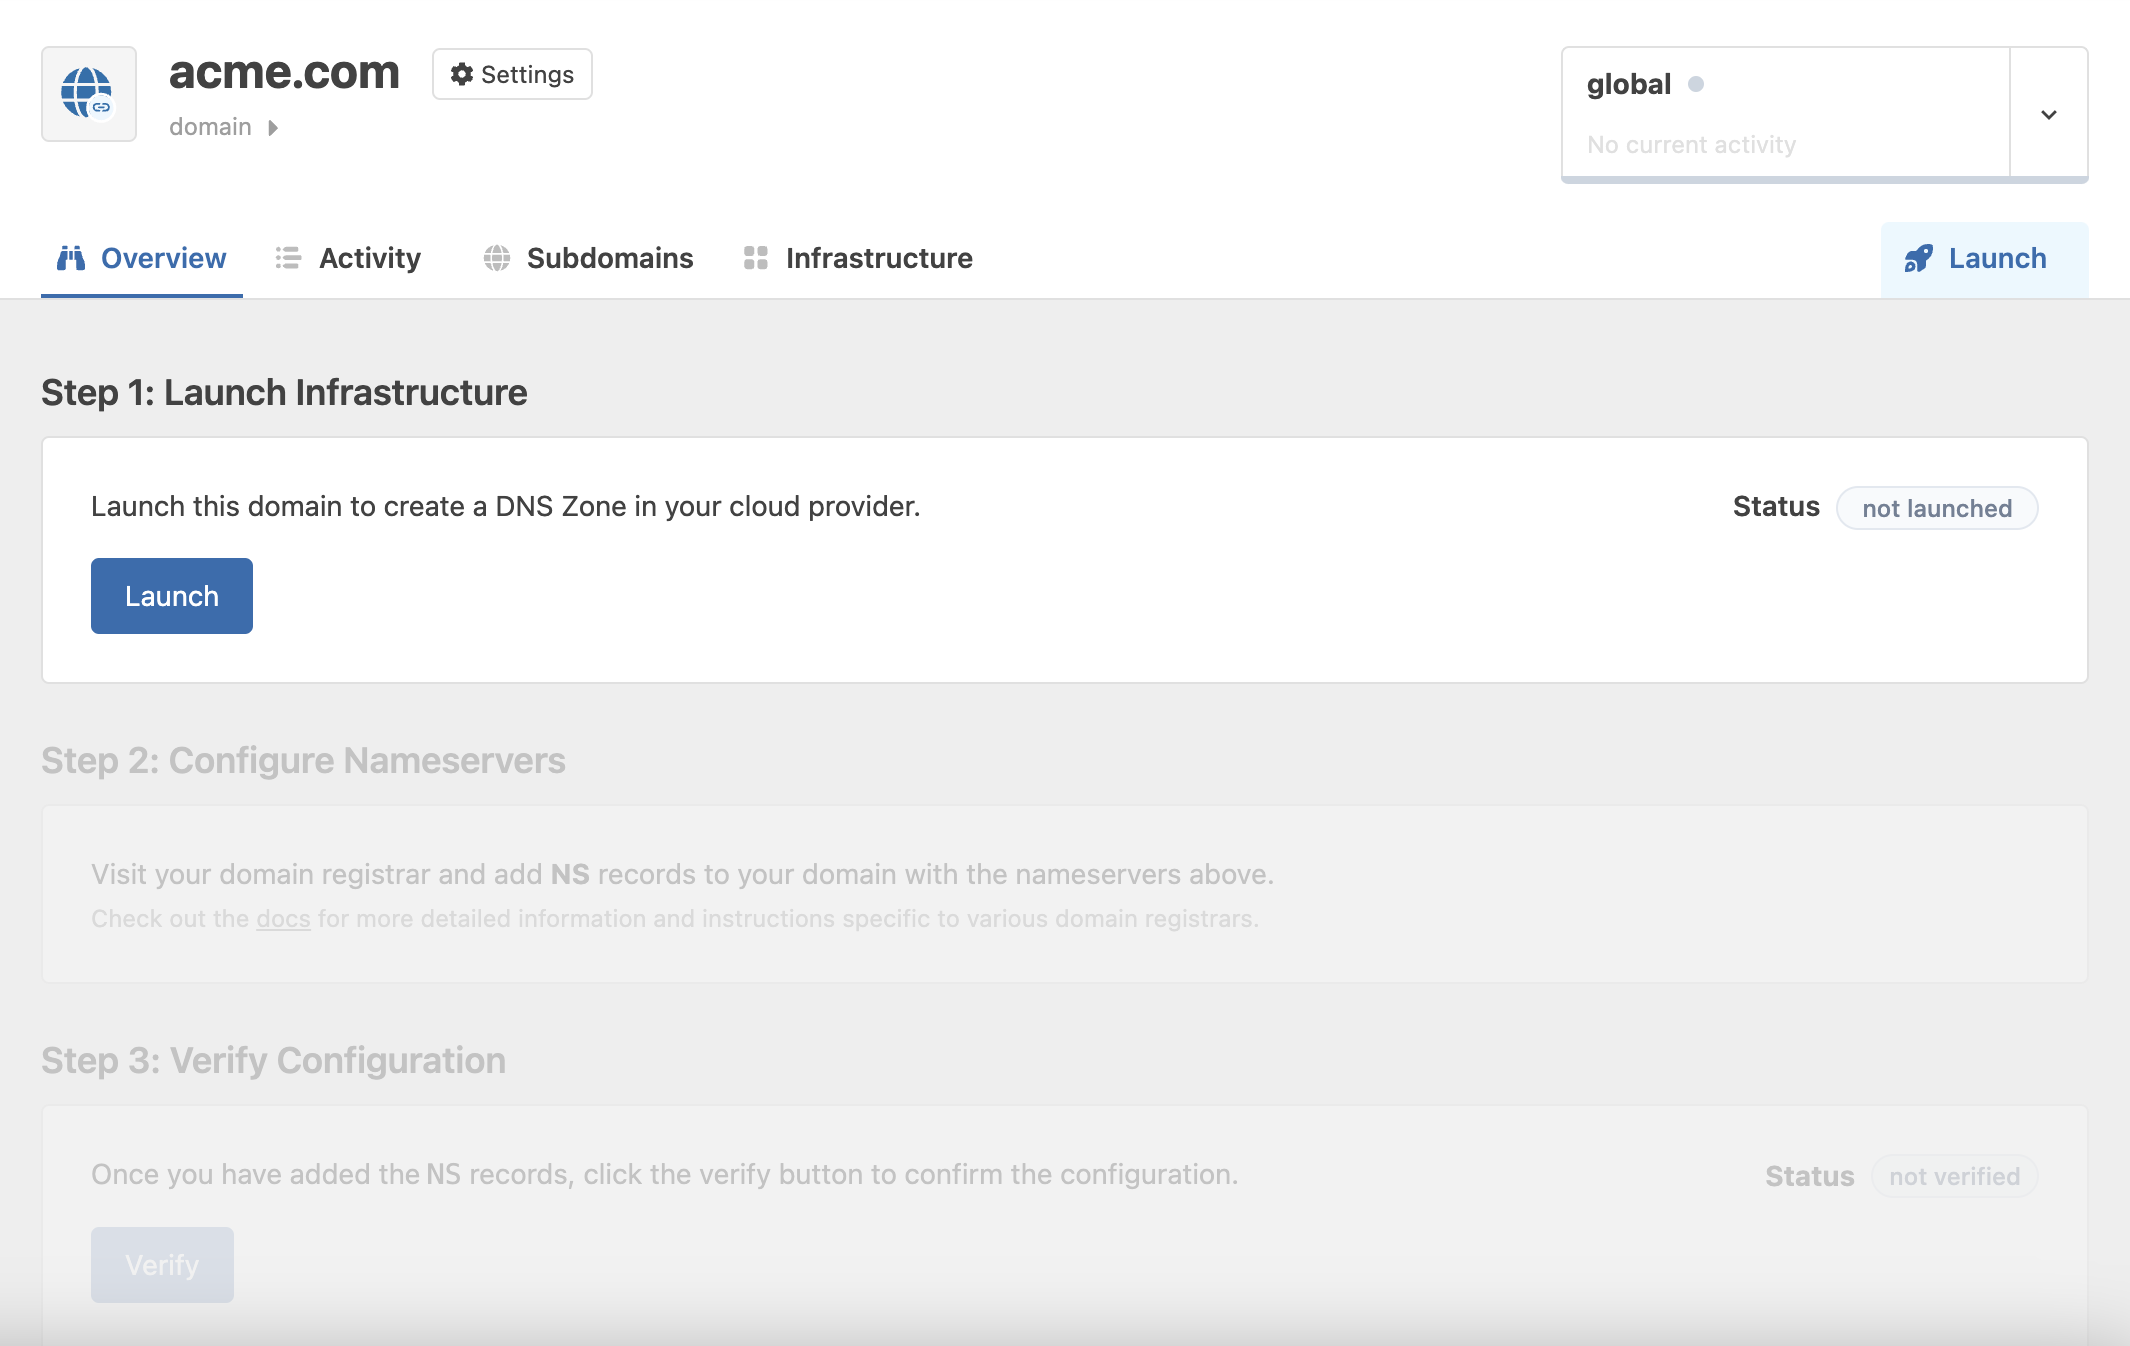
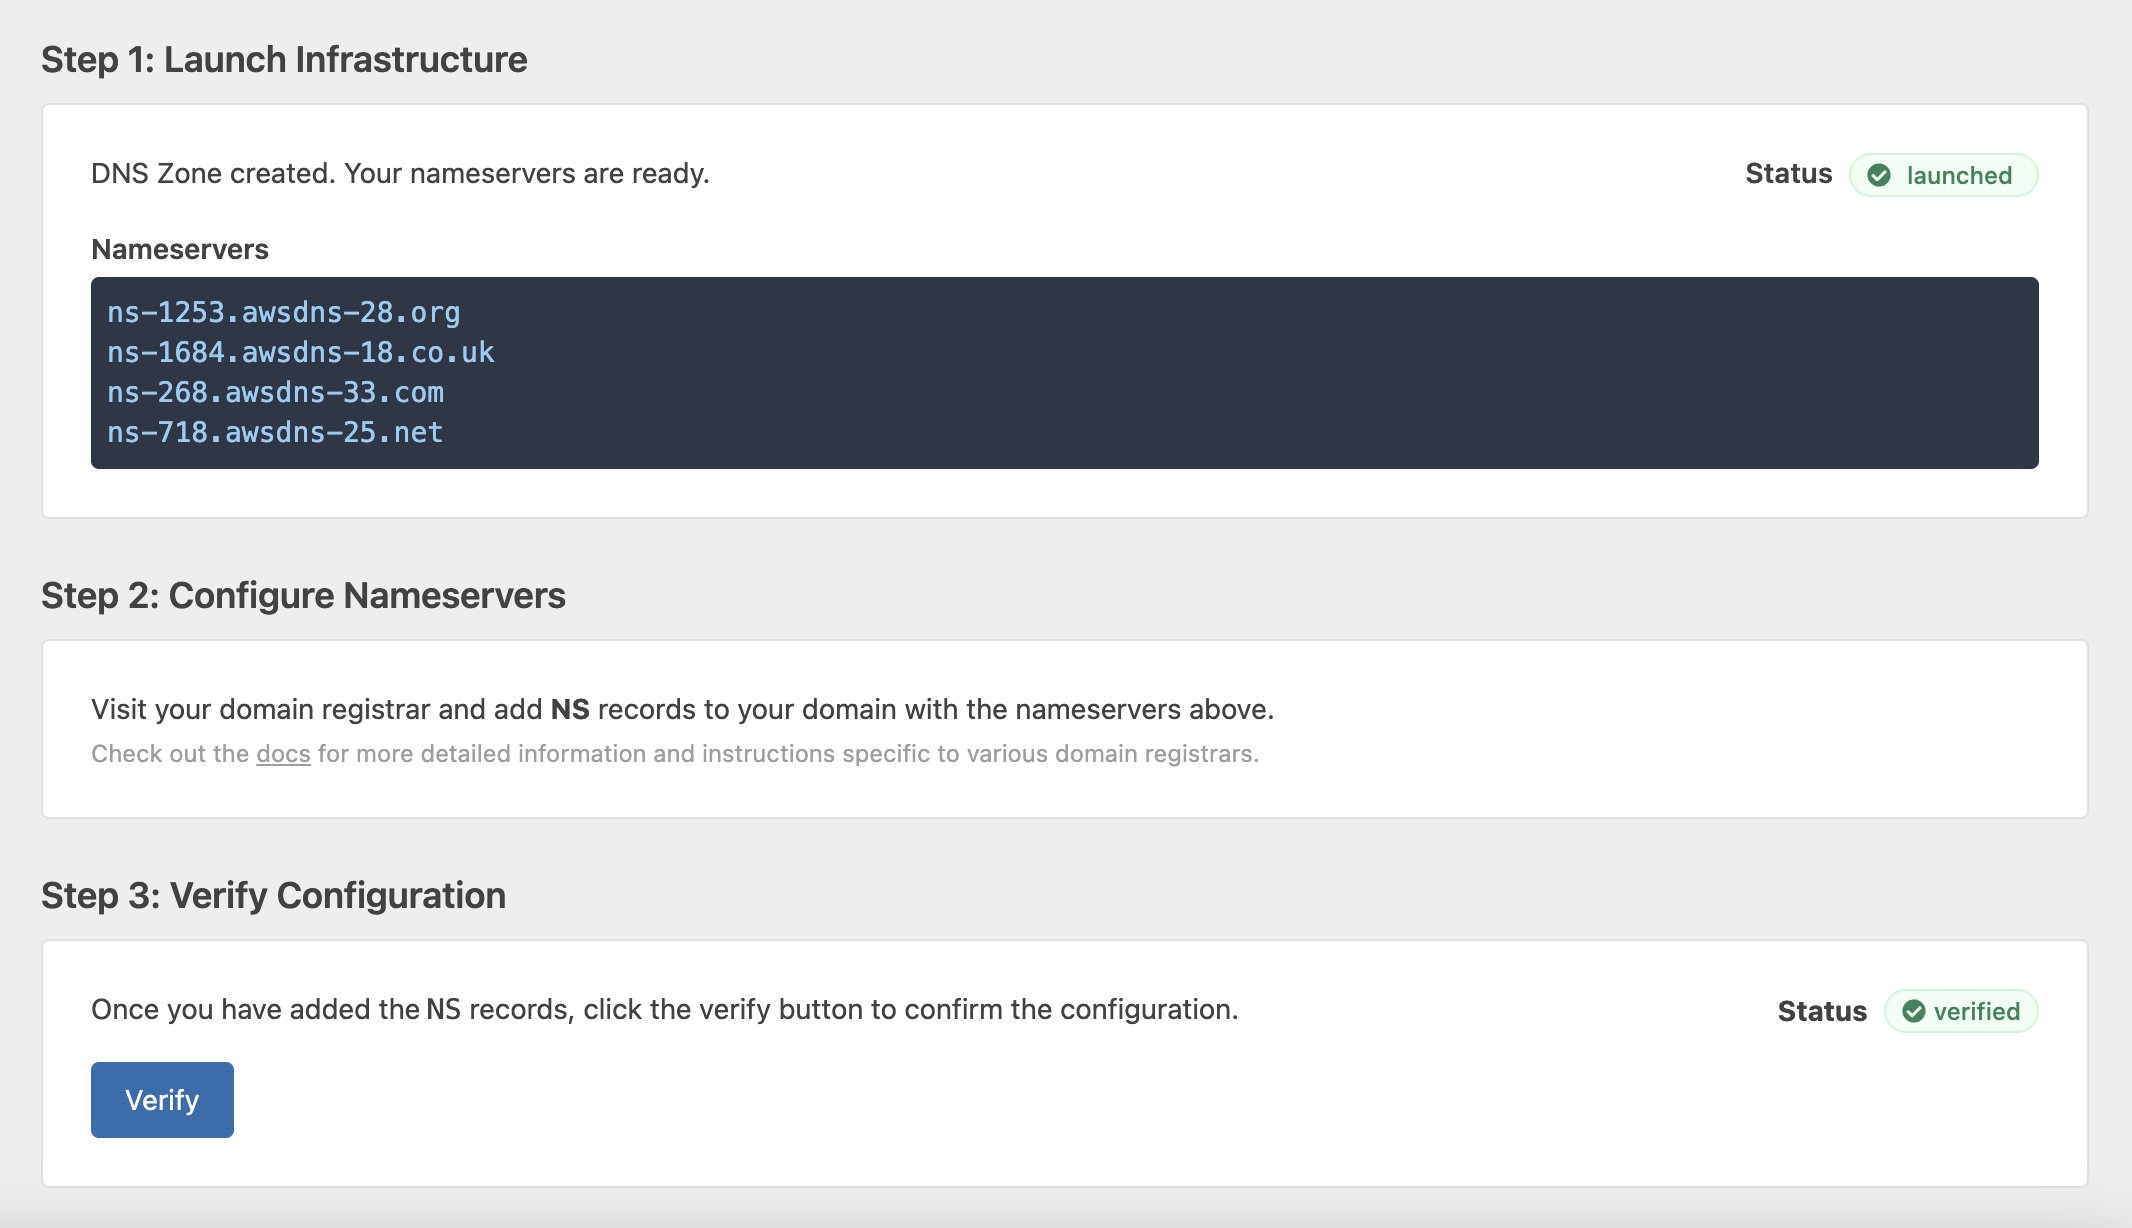
Once the DNS Zone is created, Nullstone will list the nameservers for your DNS zone. 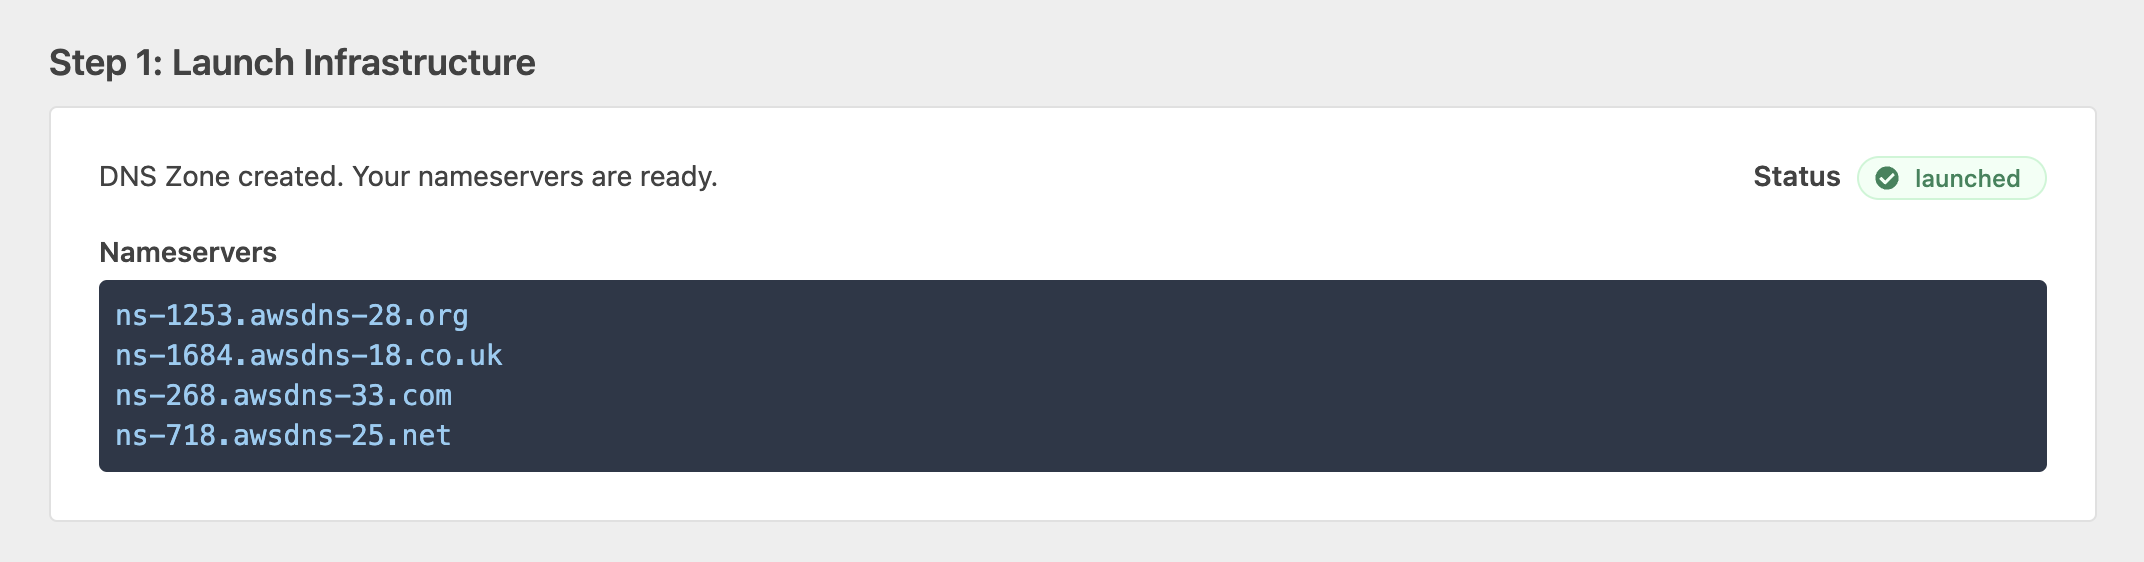
Configure Domain Registrar
To finalize the process, you will need to forward DNS requests from your domain registrar to the newly-created DNS zone from the previous step. To do this, add NS records to your domain with the nameservers listed in the domain details section. See Registrar-specific instructions below.
Verify Domain
Once you have added NS records to your domain, revisit the Nullstone UI and click "Verify" in the details page of your domain. Once successful, you will be ready to create and launch subdomains in Nullstone. A fully launched and verified domain looks like this:
WARNING
It can take several minutes for DNS changes to propagate. Use DNS Checker with the domain name and NS record type to verify your nameservers have propagated.
Registrar-specific Instructions
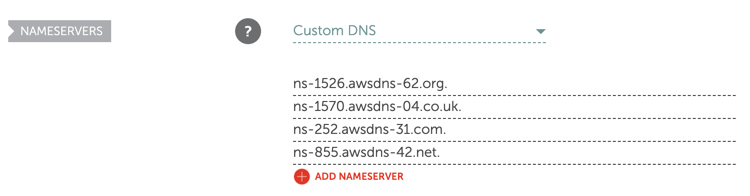
Namecheap
Visit your list of domains in Namecheap. Click "Manage" on the domain.

Configure the domain with "Custom DNS" and enter the nameservers from Nullstone.
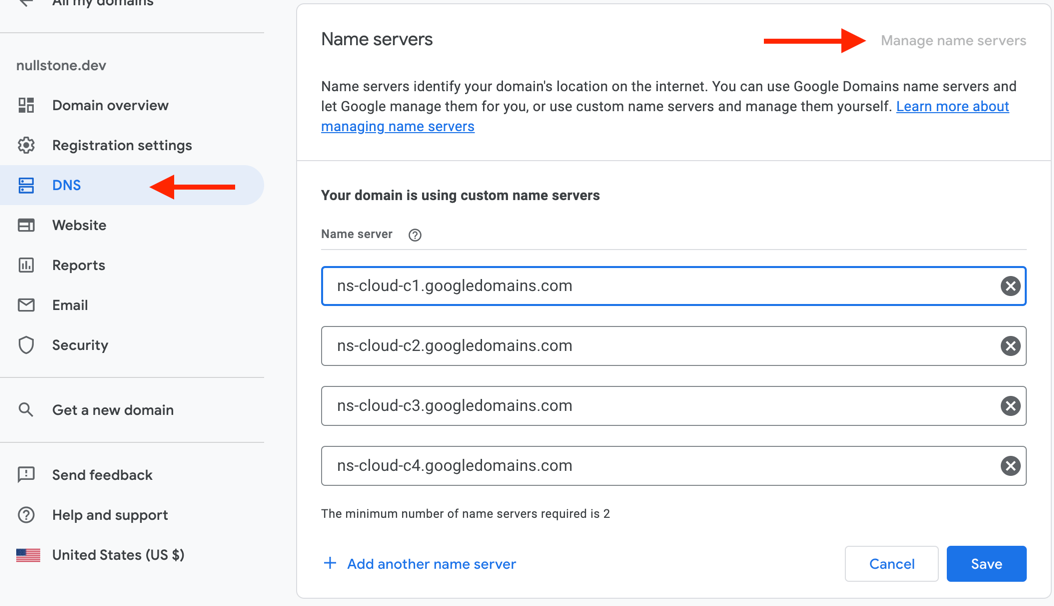
Google Domains
Visit your list of domains in Google Domains. Click "Manage" on the domain.

Visit the "DNS" section and click "Manage name servers". Copy the nameservers from Nullstone into the Google Domains input boxes.